In the previous post, you learned how to create a simple switchboard that allows you to open up different forms. In this post, we will be showing you how to create multiple switchboard pages, giving the effect of having multiple forms.
Please download 03_dbTedsTranslations_1 to follow the post.
In the database, we have a series of reports that we would like to be able to open up via the Switchboard Form. We already have six items to choose from and so do not want to add six reports to the main switchboard. For that reason, we will create a new switchboard.
Open up frmAdmin and click on cmdSwitchboard.
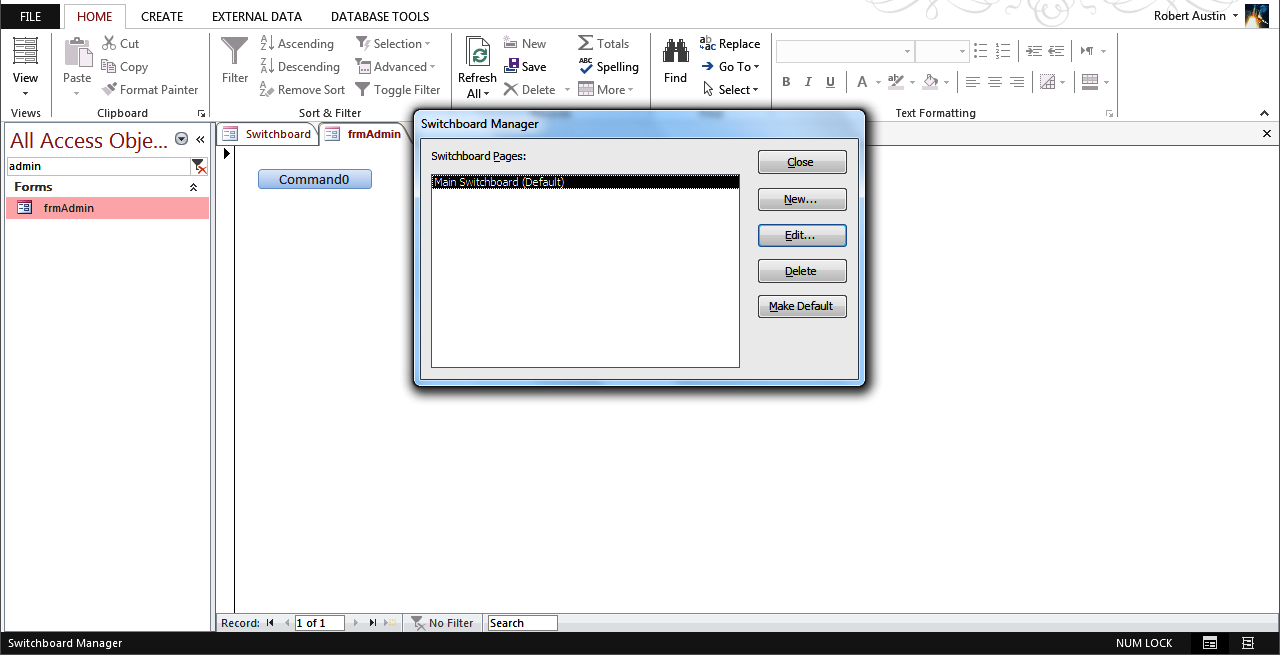 We can see that we have one Switchboard Page (Main Switchboard); we want to add another one so click on New… and name the new switchboard page Reports.
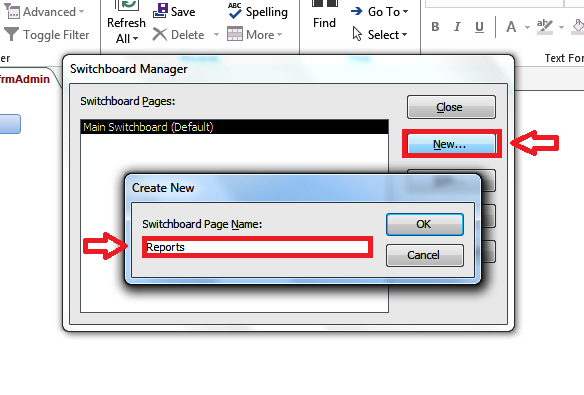 Click on OK.
You will now have a new Switchboard Page called Reports. Click on it and click Edit.
 A new dialog box will pop up.
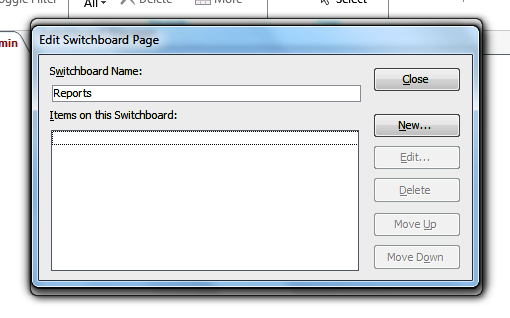 This Switchboard Page doesn’t have any operations yet. So let’s add some. Click on New… and another dialog box will pop up.
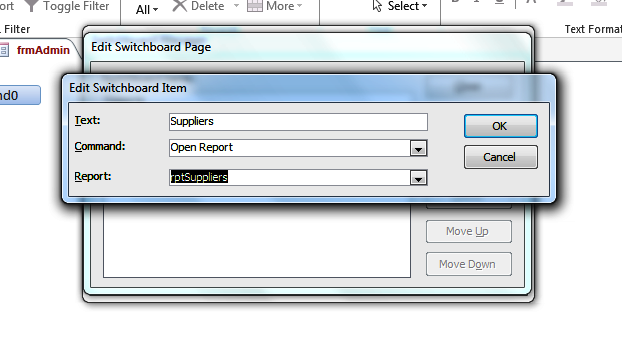
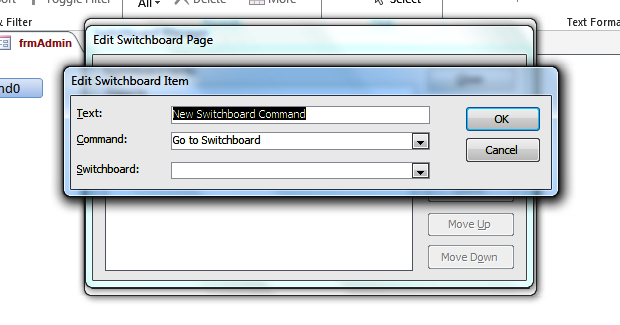 Change Text to Suppliers, Command to Open Report and choose rptSuppliers.
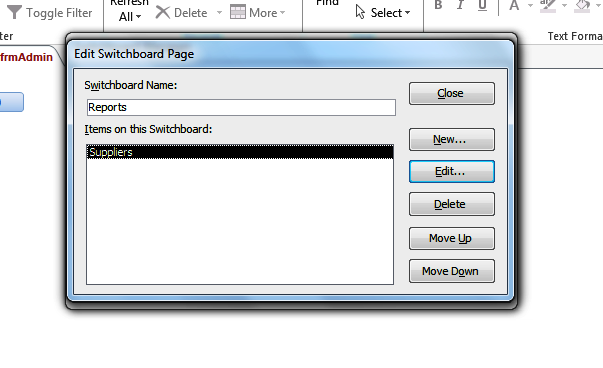
 Click on OK and you will have a new item in the Reports switchboard page.
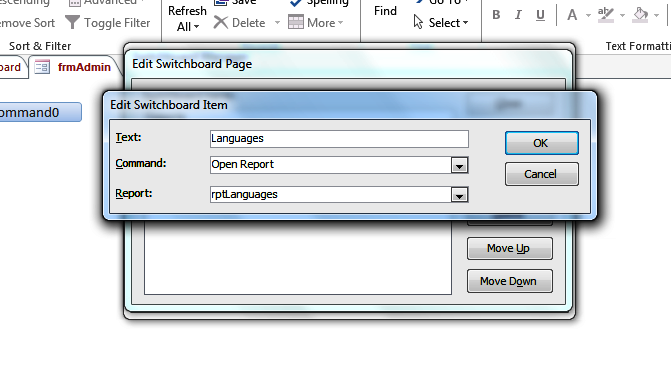
 Great! Let’s add another one. Click on new and let’s add the Languages Report.
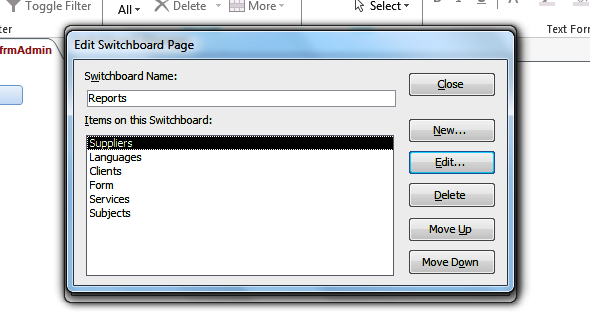
 Do the same for the remaining reports (rptClients, rptForm, rptServices and rptSubject). Your Reports switchboard page should look like this.
 Close the Reports switchboard page and you will see that we now have our two switchboard pages. But how do we go from one to the other?
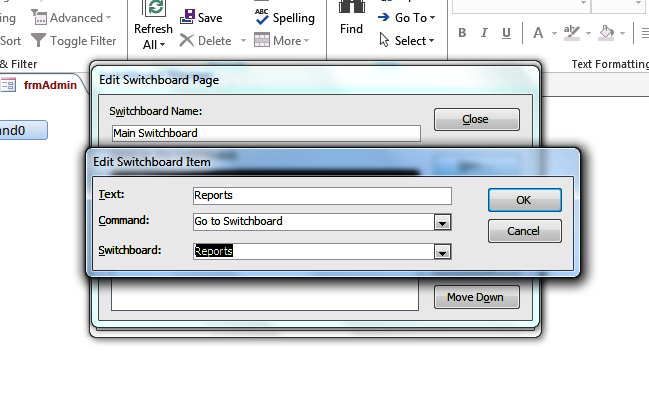
 Click on Main Switchboard and click on Edit. We need to add a button to Main Switchboard that loads up the reports switchboard. Click on New and fill in the fields as we have in the image below.
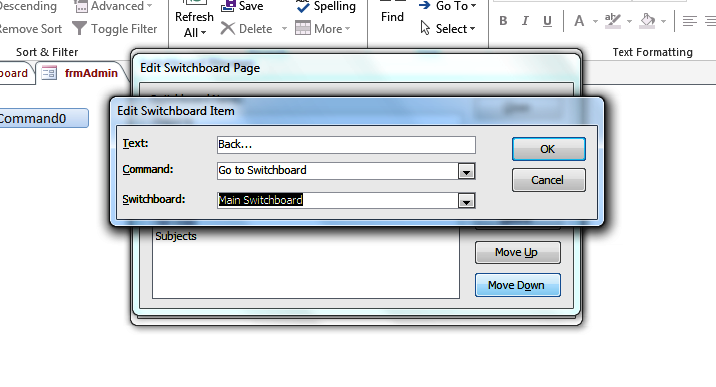
 Click OK. Close the Main Switchboard page. Click on Reports and click on Edit. We need to add a Back button to go back to the Main Switchboard from the Reports Switchboard. Click on New and fill in the fields as below.
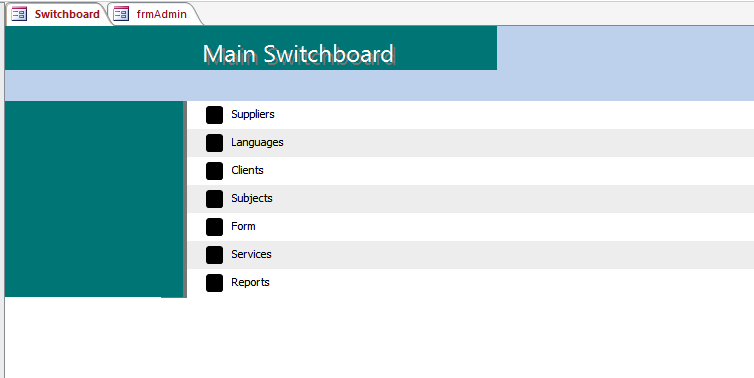
 Now close all the dialog boxes associated with designing a switchboard and open up the form Switchboard.
If you click on Reports the options on the Switchboard will change to the options below. It is still the same form but with different buttons showing.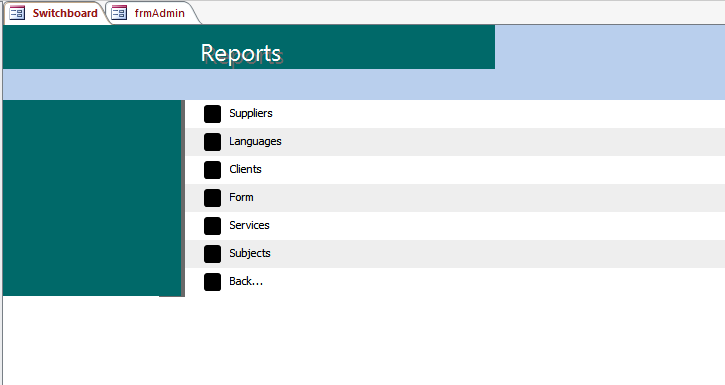 From here you can click on one of the Reports and it will open up. Clicking on the Back.. button will take you back to the Main Switchboard.
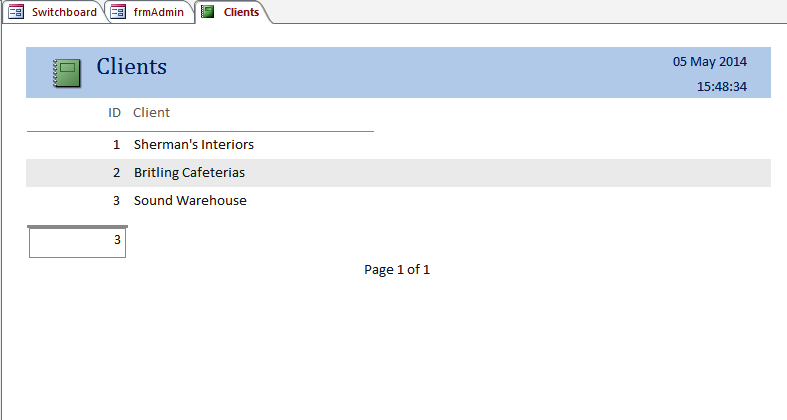 In this post, we have shown you how to create a multi-page switchboard form that looks like multiple forms but is in fact a single form.